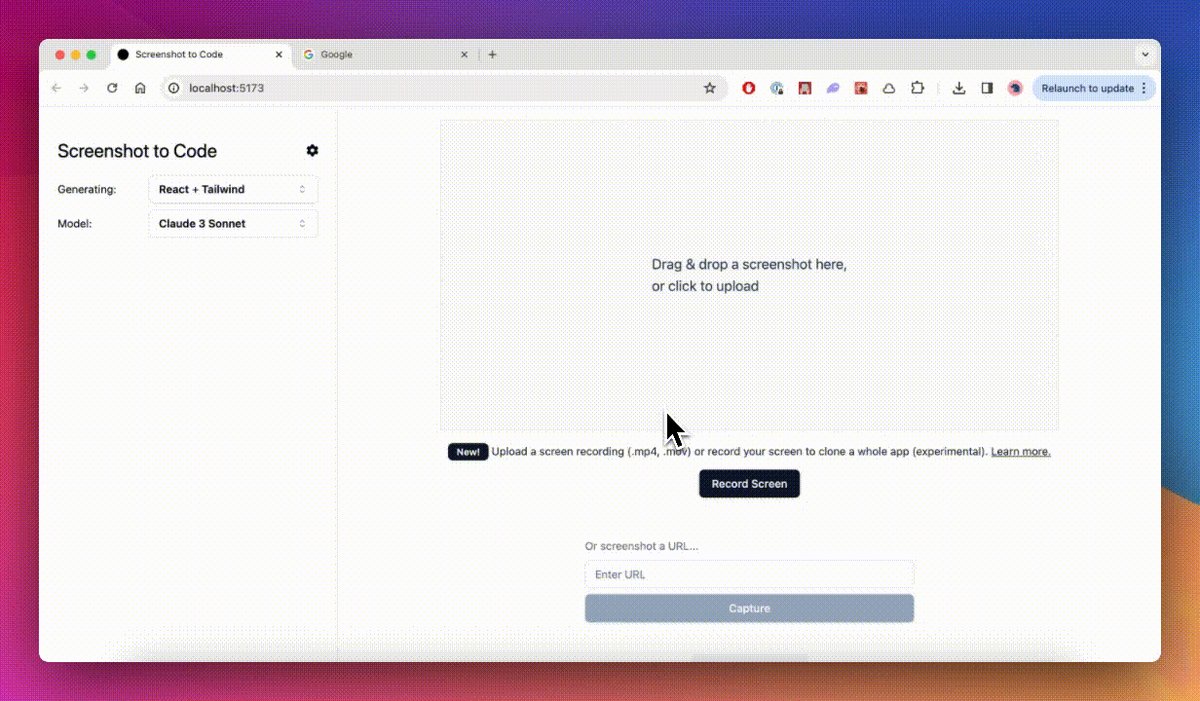
Convert screenshots, mockups, Figma designs, and screen recordings into clean, functional code using AI. The easiest way to try this is using the official, hosted product at screenshottocode.com →
youtube.mp4
Supported stacks:
- HTML + Tailwind
- HTML + CSS
- React + Tailwind
- Vue + Tailwind
- Bootstrap
- Ionic + Tailwind
Default AI models:
- Gemini 3 Flash Preview and Gemini 3.1 Pro Preview - the best models
- GPT-5.5 and GPT-5.4 Mini
- Claude Opus 4.6, Claude Opus 4.8
- z-image-turbo (using Replicate) for image generation
See the Examples section below for more demos.
Screenshot to Code also supports taking a screen recording of a website in action and turning that into a functional prototype.

Choose the path that fits what you want to do:
- Run locally: best if you want to customize, self-host, or contribute.
- Use the hosted app: the fastest way to try Screenshot to Code with no local setup. Open the hosted app →
Running locally requires API keys and a backend/frontend setup. The app has a React/Vite frontend and a FastAPI backend.
You need at least one model provider key (OpenAI, Anthropic, or Gemini). Gemini and Replicate are strongly recommended for the best quality of screenshot-to-code accuracy — Gemini powers asset extraction (reusing the real logos/images from your screenshot) and Replicate powers image generation, background removal, and image editing. Adding all four keys gives the best results and lets you compare multiple models per generation.
| Key | Required? | What it unlocks |
|---|---|---|
OPENAI_API_KEY |
One of these three | GPT code-gen variants (GPT-5.5, GPT-5.4 Mini) |
ANTHROPIC_API_KEY |
One of these three | Claude code-gen variants (Opus 5, Opus 4.8, Fable 5, Sonnet 4.6) |
GEMINI_API_KEY |
One of these three — strongly recommended | Gemini code-gen variants (3 Flash, 3.1 Pro); extracts real assets from the screenshot; required for video mode |
REPLICATE_API_KEY |
Strongly recommended | Image editing, background removal, and Replicate-backed image generation — without it, edit_images and remove_backgrounds are unavailable |
With more keys, the app automatically picks a stronger mix of models per variant; with a single key it uses that provider's models only.
If you'd like to run the app with Ollama open-source models (not recommended due to poor-quality results), follow this comment.
Run the backend (I use Poetry for package management; run pip install --upgrade poetry if you don't have it):
cd backend
echo "OPENAI_API_KEY=sk-your-key" > .env
echo "ANTHROPIC_API_KEY=your-key" >> .env
echo "GEMINI_API_KEY=your-key" >> .env
echo "REPLICATE_API_KEY=r8_your-key" >> .env
poetry install
# Install the Chromium browser used by the screenshot preview tool.
# On Linux, use `poetry run playwright install --with-deps chromium` to also
# install the required system libraries (needs sudo/apt).
poetry run playwright install chromium
poetry env activate
# run the printed command, e.g. source /path/to/venv/bin/activate
poetry run uvicorn main:app --reload --port 7001
You can also set up OpenAI, Anthropic, and Gemini keys using the settings dialog in the frontend (click the gear icon after loading the app). Replicate must be configured in backend/.env as REPLICATE_API_KEY. The Settings dialog also shows whether screenshot preview is available on your backend.
Screenshot preview (optional) lets the agent render its own generated page in a headless browser and visually check its work. It's enabled automatically once Chromium is installed (the
playwright install chromiumstep above, or automatically in the Docker image). If Chromium is missing, the app just skips the tool — the Settings dialog shows whether it's available.
Run the frontend:
cd frontend
pnpm install
pnpm dev
Open http://localhost:5173 to use the app.
If you prefer to run the backend on a different port, update VITE_WS_BACKEND_URL in frontend/.env.local.
If you have Docker installed, run this from the root directory:
echo "OPENAI_API_KEY=sk-your-key" > .env
docker-compose up -d --build
The app will be up and running at http://localhost:5173. Note that you can't develop the application with this setup, as file changes won't trigger a rebuild.
- I'm running into an error when setting up the backend. How can I fix it? Try this. If that still doesn't work, open an issue.
- How do I get an OpenAI API key? See https://github.com/abi/screenshot-to-code/blob/main/Troubleshooting.md
- How can I configure an OpenAI proxy? If you're not able to access the OpenAI API directly, for example because of country restrictions, you can try a VPN or configure the OpenAI base URL to use a proxy. Set
OPENAI_BASE_URLinbackend/.envor directly in the UI in the settings dialog. Make sure the URL hasv1in the path, for example:https://xxx.xxxxx.xxx/v1. - How can I update the backend host that my frontend connects to? Configure
VITE_HTTP_BACKEND_URLandVITE_WS_BACKEND_URLinfrontend/.env.local. For example, setVITE_HTTP_BACKEND_URL=http://124.10.20.1:7001. - Seeing UTF-8 errors when running the backend? On Windows, open the
.envfile with Notepad++, then go to Encoding and select UTF-8. - How can I provide feedback? For feedback, feature requests, and bug reports, open an issue or ping me on Twitter.
NYTimes
| Original | Replica |
|---|---|
 |
 |
instagram.mp4
Hacker News